

Clean & Prepare
The core, or coupon, removed from the pavement using the rotary cutter can be reinstated as a permanent repair using Utilibond, after the hole has been properly backfilled and compacted.
The first step of reinstating is to properly prepare/clean the cored hole. Wipe clean all cut surfaces of the core and walls of the hole with a clean damp sponge to remove all loose cutting debris and particulate from the cut surface.
Proper bonding depends on achieving a clean surface for the bonding agent to adhere to.
Add Pea Stone
Line the bottom of the hole with a 1″-2″ bed of pea gravel.
Because the pea gravel is added fill that was not present before, the backfill should be left lower than the base of the pavement during backfill procedure.
Undercut the bottom of the existing pavement in the hole by about 1″ all around to allow the pea gravel to fill under the pavement, as the Utilibond will impregnate the pea gravel and create a solid base for the core to sit on

Dry Fit the Core
Using the core puller / lifter, lower the core back into the hole and check for level and flushness with the existing pavement. Adjust the pea gravel until the core is level with the surrounding pavement, and approximately 1/8″ below the surface of the surrounding pavement
This process is referred to as “dry fitting” the core. This is an essential step to a successful core reinstatement. Once the Utilibond has been added to the hole and the core has been reinserted, you will not have a second chance to change its level to make the core level with the surrounding pavement
Make sure it’s done right the first time
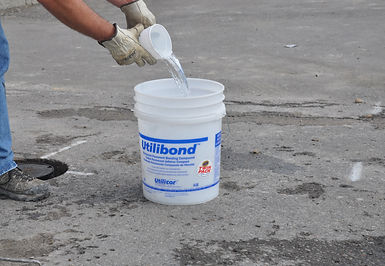
Add Water to Pail
Removing the bag(s) of Utilibond from the pail.
Using the 1 litre plastic container included in the Utilibond pail, add either 1 or 2 liters of water to the pail. 1 liter is achieved by filling the plastic container right to its top.
Do not exceed or reduce the amount of water recommended.
Proportions of water to Utilibond are crucial for effective performance, fluidity, set times, and bond strength.
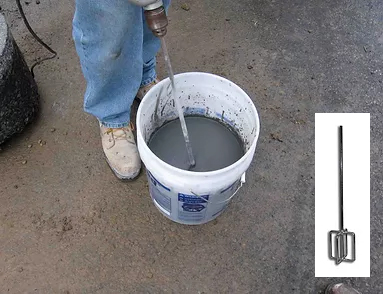
Mix Utilibond
Using a handheld drill and appropriate 4-bar style mixing blade, mix the bonding compound until it is smooth and flowing. Mixing time is approximately 2-3 minutes.
Once mixed, the final product will appear smooth and creamy with a flow characteristic similar to that of pancake batter.
The mixture will normally look dry and crumbly at the beginning of the mixing process, however the Utilibond will eventually “turn” and begin smoothing out after about a minute or so.
NOTE: Corded electric drill with 1/2″ chuck and minimum 9 amp. motor is recommended.
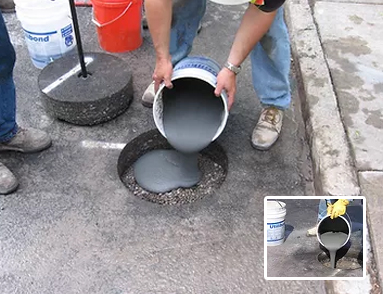
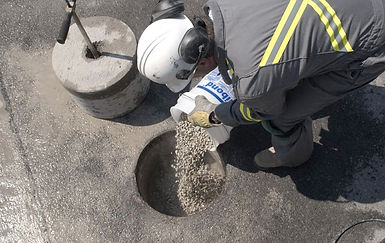
Pour Utilibond
Slowly and carefully, from a height just above the hole, so as not to disturb the pea gravel, pour the Utilibond permanent pavement bonding compound into the hole.
The quantity of Utilibond required will be dependent on the diameter of the core and its thickness
Refer to the “Twin Pack” instruction for more information
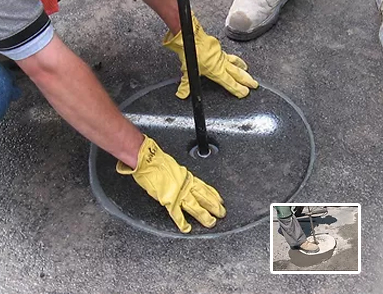
Place & Level Core
Slowly lower the core down into the hole on top of the Utilibond mixture.
Allow the bonding compound to flow up through the cut spaces around the core (the kerf), and over flow slightly onto the surface of the pavement.
Remove the core puller and allow the Utilibond to flow up through the centre hole. Apply pressure to the top of the core, and ensure the core is level with the pavement by allowing the excess Utilibond to flow up to the surface from the kerf and the pilot hole.
Check level by dragging a flat trowel across the kerf of the core.
Once the core is level with the surrounding roadway, stop any further adjustments.
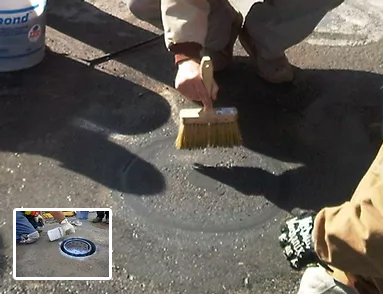
Clean Up & Keep it Wet
Carefully clean off the excess Utilibond from the surrounding pavement before it dries. The bonding compound will begin to set up within approximately 15 minutes (at 70° F).
Keep the exposed areas of Utilibond “wet” while carefully cleaning off the Utilibond from the surrounding surfaces. Due to the rapid hydration of Utilibond, failure to keep the top portions “wet” may result in cosmetic surface cracking.
In very warm weather, or in valve box installations, we recommend substituting water for “Utilicure”, which is sprayed on the surface and will inhibit the rate of hydration of Utilibond while it sets
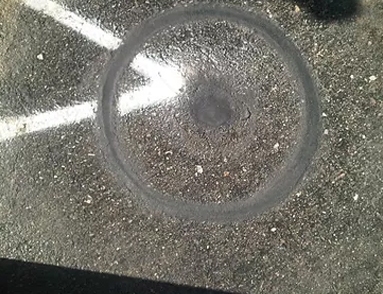
After 30 Minutes Open the Road to Traffic
Once the Utilibond has set and gained strength (30 minutes at 70° F) the roadway or sidewalk can be safely reopened to traffic.